Tuesday 25 November 2014

Kentico E-commerce Features


 E-commerce Solution 

The E-commerce solution allows your on-line store customers purchasing via the integrated shopping cart, checking the status of their orders, subscribing to newsletters, etc. Site owners are given tools for managing orders, shipping and payment options, product or manufacturer lists and much more. Among the features offered by the E-commerce solution :

Departments:
Manage your on-line store departments to organize the products and services that you offer to your customers.

Products:
Manage the products and services that you offer in your on-line store.

Product options:
Manage options that you added to the offered products and services. For example, you can offer the same product in multiple colors, configurations, etc.
Product variants:
Manage variants of your main products. For example, you can offer T-shirts in different sizes and colors. Each combination of size and color, i.e. product variant, behaves in the system as a separate product.

Manufacturers:
Manage manufacturers who make the products and provide the services that you offer in your on-line store.

Suppliers:
Manage suppliers who supply the products and deliver the services that you offer in your on-line store.

Product image galleries:
Create galleries of the offered products. For example, you can present your customers with featured images of given products.

Product categories:
Sort the products and services that you offer to your customers based on topic-related groups.

Multilingual products:
Present the products and services that you offer to your customers in multiple language versions.
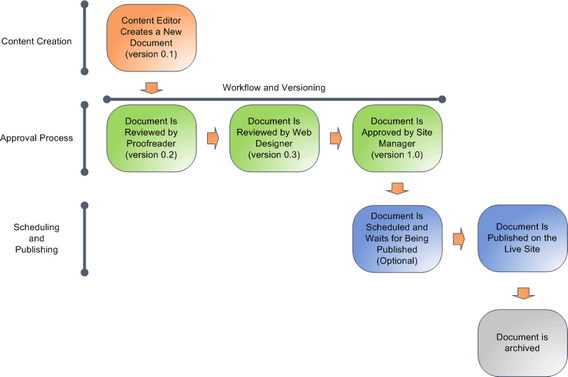
Product workflow:
Set up a reviewing and approval process to ensure quality of your website's content and design.

Multiple currencies and exchange rates:
Allow your customers to make orders in currencies different from the on-line store main currency.


Configurable tax calculation based on country and state:
Calculate taxes based on location.

Discounts
Flexibly combine and grant your on-line store customers the following types of discounts:
  •     Catalog discounts - grant your eligible customers discounts on selected products.
  •     Order discounts - grant your eligible customers discounts on their whole shopping.
  •     Free shipping offers - grant your eligible customers the benefit of free shipping.
  •     Volume discounts - offer your customers better prices if they purchase specified amounts of given products.
  •     Bundles - offer and sell your customers multiple products of various kinds as single products for special prices.
Besides, you can motivate your customers to purchase more products by providing them with discount coupons. The customers can exchange these virtual vouchers for various types of discounts (order discounts, free shipping offers, discounts on selected products).

Customers:
Manage your on-line store customers.

Orders:
Manage orders that your customers placed while purchasing in your on-line store.

Site-specific and global data:
Learn how you can use site-specific objects available only on the respective sites and global objects shared across all your sites.

Reports and statistics:
View reports and statistics related to your on-line store.

Custom providers:
Add your custom providers for alternative shipping and tax calculations.

Checkout process:
Add checkout process steps and further customize the checkout process to best suit your and your customers' needs.

Payment gateways:
Use payment gateways such as PayPal or Authorize.NET, and integrate your own payment gateways.

Create custom webpart and register it in kentico CMS

Create Your Own Custom Web Parts : 

Web parts are page components that provide a combination of content and functionality. 
Web parts exist on three different levels:
Code filesOn the most basic level, web parts are user controls (.ascx files) that inherit from an appropriate base class.
System objects
Web parts must be registered as objects in the system. The purpose of the objects is to:
  • Specify the path to the user control source file
  • Define the web part's properties and store other configuration options
Page components
Web parts placed onto page templates are called web part instances. You can create any number of instances of a single web part.
Instances must be inserted into web part zones, which are defined within the layouts of page templates.

 A new web parts consists of two basic steps:

  1. Create the web part's code files in your web project.


1) Open the WebProject solution created at the time of installing Kentico.

2) Within the folder 'CMSWebParts' create a new folder lets say 'CustomWebParts'.
3) Create a new UserControl(ascx file) with required functionality within this folder(Let the name is MyCustomWebPart.ascx).

4) Add the following line to the beginning of the code:Example in C# :-using CMS.PortalControls;

5) In the ascx file we have to change the following lines:-
public partial classCMSWebParts_CustomWebParts_MyCustomWebPart

System.Web.UI.UserControl public partial class

CMSWebParts_CustomWebParts_MyCustomWebPart: CMSAbstractWebPart

CMSWebParts_CustomWebParts_MyCustomWebPartCMSAbstractWebPar

to public partial class

2. Register the web part in the cms system.

  1. Open the Web parts application.
  2. Select the category where you want to place the web part.
  3. Click New web part.
  4. Type a Display name for the web part.
  5. Specify the path of the user control in the File path field.
  6. Click Save.
  7. Define the properties of the web part. See Working with web part properties for more information.
 Before you can use your user controls as web parts, you need to register them as objects in Kentico. The system sorts web parts into categories, organized in a tree structure.
Implement web parts as user controls (.ascx files) that inherit from an appropriate base class:
Base class
Use for
CMSAbstractWebPartStandard web parts.
CMSAbstractEditableWebPart
Web parts that provide content editing functionality on the Page tab of the Pages application and in on-site editing mode (such as Editable text or Editable image).
CMSAbstractLanguageWebPartWeb parts that allow users to switch between languages on multilingual websites.
CMSAbstractLayoutWebPart


Monday 24 November 2014

Kentico CMS 7: Workflow


About workflow?

Workflow is a sequence of steps that define the life cycle of a document. This allows for setting up a reviewing and approval process to ensure quality of content and design. In such a process, you can specify the roles that different people will play and the places in the flow where the individual people will have influence on a particular document.

An example of a simple workflow process for a website that publishes articles of movies. An author can write an article and send it for approval to an editor, who will make corrections and submit the article to the head of the respective department. The head will then publish the document, thus making it publicly available to read on the website.

About features available in ?

Kentico CMS allows you to use workflow for all documents in the content tree, including uploaded files. It consists of the following features:

• The workflow support allows you to organize the process of content creation, updates and publishing on your website.

Advanced workflow adds support of branching the workflow process based on macro conditions and user decisions. It also allows for automatic manipulation of the documents as they go through the workflow process.

• The versioning support is tightly bound with workflow and allows you to store, view and roll back previous versions of the content.

Versioning without workflow creates a new version whenever a document is modified, while the whole editing process remains as if the document was using no workflow at all.

•The content locking (check-in/check-out) support allows you to avoid concurrent modifications of the same document by multiple users.

•The preview support allows you to see the content in the context of the site before it's published. This feature is only available for documents that use workflow - you can preview the documents before switching them to the following step.

•The archiving support allows you to archive a document. Such a document is no longer displayed on the website, but it's kept in the content tree and can be re-published at any time later.

Kentico Workflow Steps 

Type of workflow

Kentico CMS offers two types of workflows - basic and advanced.

A) Basic workflow
 

In a basic workflow, one step is followed by another in a direct sequence. A basic workflow cycle of a document starts in the Edit step, which means the document is newly created or that there are yet unapproved changes in the document. After going through the defined approval steps, the document gets into the Published step. At that point the system makes the last version of the document visible on the live site.

B) Advanced workflow

Advanced workflow significantly differs from basic workflow in the way how you can design the flow of steps. You can let a document go through different steps based on various conditions, you can allow editors to choose which step they want the document to be moved to, or you can set timeouts for automatically moving documents from one step to another.
Building the content of a website with several editors usually comes with the need to approve this content before publishing, to provide reliable and consistent information to site visitors. This is one of the many scenarios where the Workflow module can be applied. The Advanced Workflow module, with features like branching based on macro conditions, user choices, automated actions and timed actions, brings more power in defining document approval processes to cover even advanced scenarios.

Creating / Designing a workflow : 

You can create and manage workflows in Site Manager -> Development -> Workflows.
 
For basic workflow :
  1. Log in to Site Manager and navigate to Development -> Workflows.
  2. Click AddWorkflow New workflow. 
  3. Choose a name for the new workflow and type it in the Display name text box.
  4. Click Save Save
The workflow appears in the list on the Workflows page.

Converting a basic workflow to advanced workflow

The Workflow page allows you to convert a basic workflow to an advanced workflow.

1. Log in to Site Manager and navigate to Development -> Workflows.

2. Edit (Edit) a basic workflow.

3. If the workflow has the Automatically publish changes property turned on, turn the property off and save the workflow.

4. Click SelectConvert to advanced workflow. A message will appear asking if you really want to convert the workflow to advanced workflow.

5. Click OK to finish the conversion or click Cancel to return to the workflow editing page.

The system converted the basic workflow to an advanced workflow. Also, all the defined steps have been converted into advanced workflow steps.


Creating and managing basic workflow steps 


Creating a workflow step

1. Edit a basic workflow and switch to the Steps tab.

2. Click AddWorkflowStep New workflow step.

3. Enter a name into the Display name field. This is the name that will be displayed to editors when viewing documents that are in the step.

4. Click Save Save.

Rearranging workflow steps

You can move steps up and down using the Up Move up and Down Move down buttons in the list of steps. However, you cannot move the default steps, nor can you move any custom step before the Edit step or past the Published step. If you wish to design a flexible workflow process where the cycle doesn't begin and end with the default steps, consider using an advanced workflow.


Work Steps :-


Configuring workflow operators :

Allowing users to approve or reject documents

Kentico CMS allows you to assign different users and roles to different steps, which in turn allows the specified users and roles to approve or reject documents in a particular step.

This procedure applies to both basic and advanced workflow.


About Kentico CMS

 Kentico CMS

Kentico CMS is a web content management system (WCMS) for building web sites, on-line stores, intranets and Web 2.0 community sites. Kentico is being used by more than 16,000 Web sites in 90 countries. Kentico CMS utilizes ASP.NET and Microsoft SQL Server. Kentico allows development via its portal engine or using Visual Studio. Kentico is also compatible with Microsoft Windows Azure Platform.


About Kentico CMS 7?

Kentico CMS 7 for ASP.NET is a complete solution that allows you to easily create, manage, and maintain your own websites; either on-premise or in the cloud. Whether you’re building a company website, a mobile website, an online store, an intranet, or a social network, Kentico CMS 7 for ASP.NET provides you with a complete, flexible and robust content management system that empowers you to get the job done.
The many easy-to-use features in Kentico CMS 7 put users in the driver’s seat for website creation and management, no matter the user’s level of technical knowledge. Its powerful WYSIWYG editor, similar to Microsoft Word, displays a look that you’ll find familiar and easy to understand. 

About Kentico CMS 8.0 ?

 Kentico CMS 8.0 is enhanced version of completely redesign the interface for ease of use.
For  ASP.NET is a complete solution that allows you to easily create, manage, and maintain your own websites; either on-premise or in the cloud.


Know More About Kentico From http://www.kentico.com/